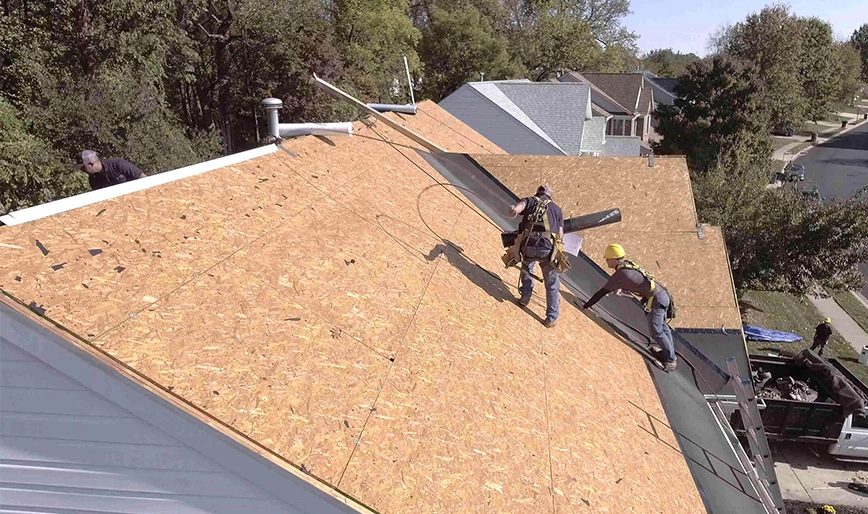
Inspecting and Replacing Roof Decking: Identifying Wood Rot and Replacing Sheathing
Roof decking, or sheathing, consists of thin wood boards that span the trusses, providing support for the rest of the roof. When roof decking becomes wet, it can develop wood rot, compromising the entire roof's performance. This issue often goes unnoticed because damaged roof decking hides beneath shingles and above attic insulation. Although sheathing isn’t usually visible, homeowners can avoid severe problems by knowing when to inspect for wood rot, how to identify it, and how to fix it. This guide will help you protect your roof and home from wood rot.
Why is Rotted Roof Decking a Problem?
Most roof decking, also called sheathing, is made from plywood or oriented strand board (OSB). These thin sheets absorb moisture from excess condensation or leaks. Frequent exposure to moisture can lead to decay or wood rot. While a single exposure is unlikely to cause rot, repeated water exposure may.
Consequences of Damaged Roof Decking:
Bowing or Bulging: Moisture and wood rot can cause decking to sink or swell, creating bulging or bowing spots on the roof. This can compromise the functionality of shingles and lead to decking collapse.
Fungal and Mold Growth: Unchecked moisture and wood rot can promote the growth of fungi and mold, which can reduce indoor air quality and exacerbate respiratory conditions.
Insulation Damage: Moisture and wood rot can damage attic insulation, reducing home energy efficiency and increasing heating or cooling costs.
Structural Wood Damage: Dry wood rot can spread to other wooden structures, potentially causing costly damage.
Damage to Other Home Systems: Unresolved moisture issues can damage various home systems, including electrical systems, and can spread wet rot to other wooden structures.
How to Identify Wood Rot in a Roof Deck
Wood rot can be classified into two main types: dry rot and wet rot, each with different appearances. Wet wood rot often looks discolored or darker, while dry wood rot appears as a fungal growth, making the wood cracked and dry.
Signs of Wood Rot:
Dark spots on wood.
Black, white, yellow, brown, or grey growths and discoloration.
Spongy and weak wood to the touch.
Easily crumbling or cracking wood.
Damp, musty smell.
Signs of Dry Wood Rot:
Grey, white, or brown growths on the wood resembling mushrooms or pizza.
Long cracks in dried-out wood.
Musty smell.
Experienced roofers can sometimes detect wood rot by feeling for softness while walking on the shingles.
When Should I Check My Roof for Wood Rot?
Tearing up shingles to inspect decking isn’t typical home maintenance. You should check for wood rot when you don’t know the deck’s condition, such as when buying a new home, or when you suspect moisture penetration. Professional home inspectors or roofers should check for wood rot in the following situations:
Selling your home and wanting to ensure the roof boosts home value.
Purchasing a new home and verifying roof condition.
After a roof leak, ice dam, tree damage, or other potential damage.
During a full roof replacement.
If attic moisture issues develop.
Before installing new attic insulation or ventilation.
Roofers might not need to remove shingles to detect decking rot; they can often spot signs from inside the attic.
Why is My Roof Decking Damaged?
Leaks and condensation are the primary causes of rotting roof decking. Deck rot is more likely around leak points like skylights, roof penetrations, and anchor points for roof-mounted items. A professional roofer needs to fix the underlying leak before addressing the rot.
How to Replace Rotted Roof Sheathing
After fixing the moisture source, professional roofers will replace all affected wood. Here’s a step-by-step guide on how they’ll do it:
Tools and Materials Required:
New decking
Safety equipment
Crowbar or shingle removal tool
Measuring tape
Saw
Roofing nails
Roofing hammer or nail gun
Roofing material to cover new decking
Replacement Process:
Estimate Damage Extent: Roofers estimate the potential extent of wood rot to gauge repair scope.
Remove Roofing: Roofing above the damaged decking, including shingles and underlayment, is removed. Flashing might also need removal.
Measure the Area: Roofers measure the extent of wood rot and mark areas for replacement.
Cut Out Rotted Wood: Using a saw, roofers carefully remove the rotted wood without damaging the rafters below.
Cut Replacement Decking: New decking material is cut to fit the gaps, ensuring it’s the same thickness as the old decking.
Position Replacement Decking: Roofers position and trim the new decking as needed for a proper fit.
Secure the Decking: The new decking is secured with nails or screws.
Optional Additional Measures: Roofers may seal nearby wood or apply waterproof tape for added protection.
Replace Roofing Materials: New roofing materials, including ice and water protector, are installed to protect the new decking. Original shingles should be replaced, not reused.
What if My Roofer Didn’t Replace My Roof Decking After a Leak?
If decking wasn’t replaced after a leak, it might not necessarily be a cause for concern. Not all wet decking needs replacement. However, if significant damage occurred, a second opinion from another roofer might be advisable.
Ask a Professional About the Condition of Your Roof Decking
Concerned about potential wood rot in your roof deck? It’s best to address it promptly to protect your home. By understanding the importance of roof decking, identifying wood rot, and knowing how to address it, homeowners can effectively maintain their roofs and protect their homes from potential damage.
Need a free roofing inspection? Contact us today!
Photo